We're updating our Terms of Service to ensure fairness and sustainability of our Free Plan: learn what's changing and how it affects you.
What is MFA and how I can enable / disable it?
MFA stands for multi-factor authentication: it is a security feature that allows you to use a Time-Based One-Time Password (TOTP) device, such as your smartphone, to authenticate. A Time-based One-time Password Algorithm (TOTP) is an algorithm that computes a one-time password from a shared secret key and the current time, used to provide an additional layer of security to sign-ins: essentially, both the server and the client compute the time-limited token, then the server checks if the token supplied by the client matches the locally generated token.
With Verifalia, MFA involves using both a password and a token to prove your identity. MFA can be activated for Verifalia users, including the root user - note that browser apps do not support this feature.
How does MFA improve the security of my account?
Controlling access is crucial, and multi-factor authentication adds an extra layer of security to your Verifalia account. The key feature of MFA is its multiple requirements for access, making it extremely difficult for unauthorized individuals to break into your account.
How can I use MFA?
First of all, you don’t need any new physical device to get your token: you can manage the entire process with a device-generated token, typically using your smartphone, in addition to your username and password.
Adding MFA to a Verifalia user is easy and can be done with an authenticator app like Google Authenticator. Here are the steps to follow:
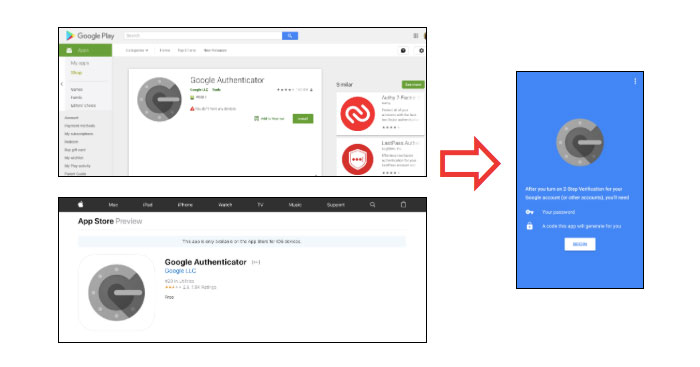
- Go to the Play Store or Apple Store and install the “Google Authenticator” app.
- Log into your Verifalia dashboard. Click the Account security settings link next to your account ID to add MFA to your root Verifalia user, or locate the user you wish to modify in the Users interface and click the corresponding Edit button. You will be redirected to the page that allows you to set Verifalia’s Multi-factor authentication.
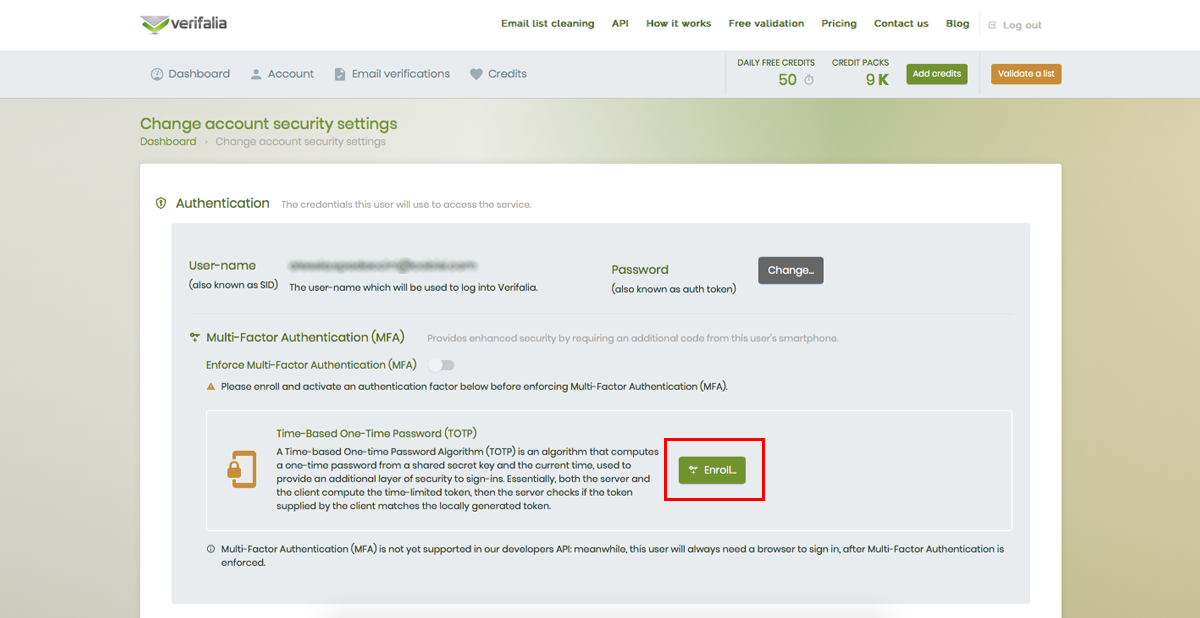
- Click on Enroll to start the security process and make sure you have your Google Authenticator ready! Remember to save your QR code or, better yet, your security key in a safe place to associate your token with more than one device.
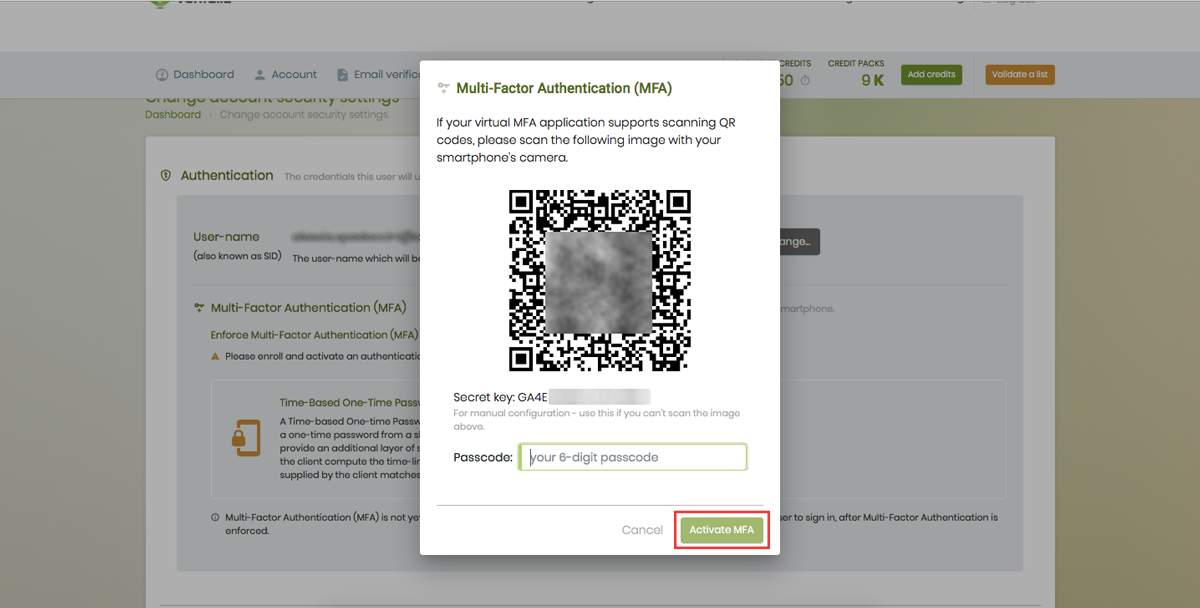
- To complete the enrollment, either scan the QR code or enter your secret key. Choose the method you are most comfortable with, and in just a few seconds, you will have your new Verifalia account on Google Authenticator with your temporary one-time token displayed!
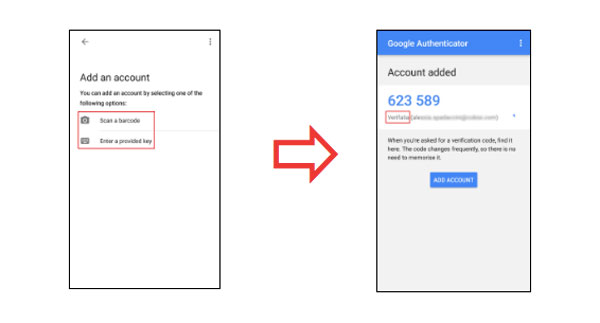
- Once the enrollment is complete, enforce Multi-Factor Authentication and click on Save.
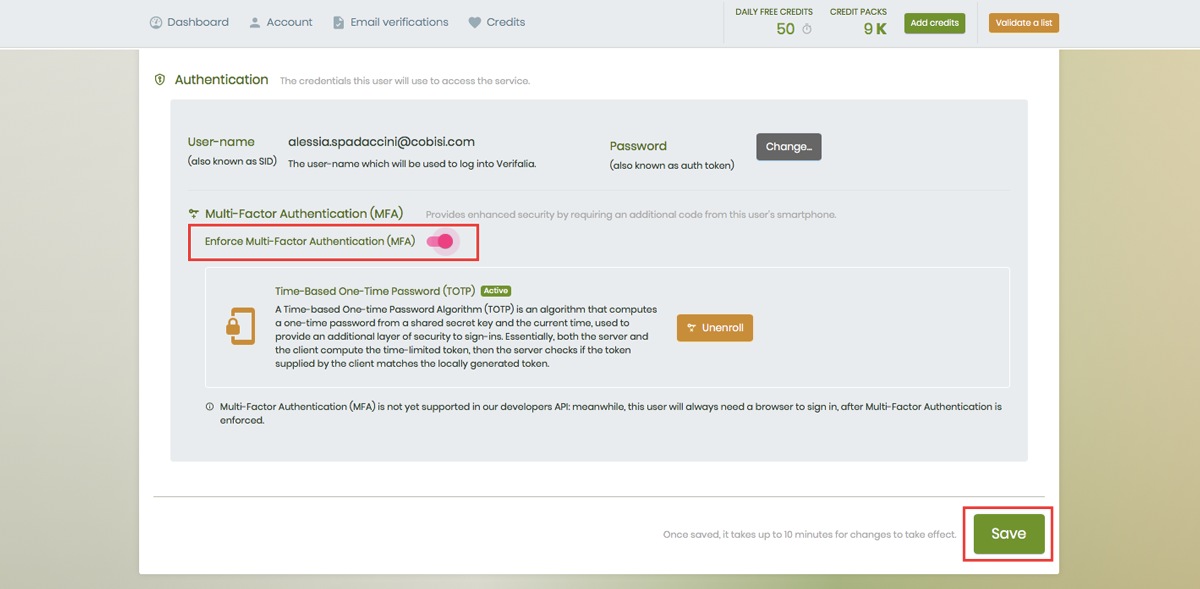
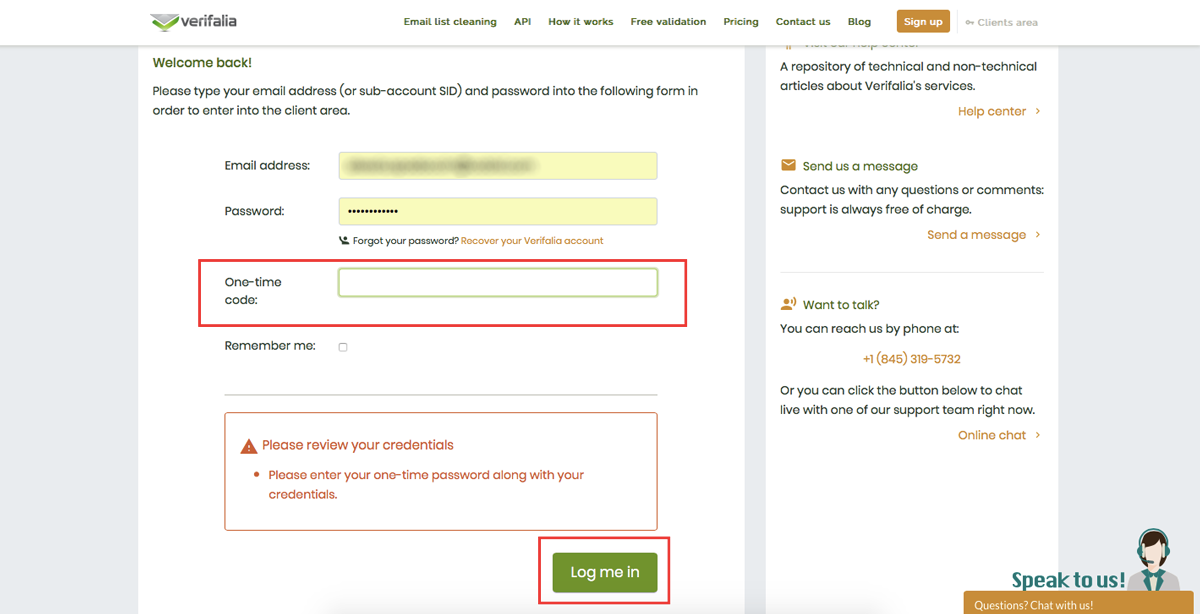
Congratulations! MFA for your Verifalia user is now ready! When the user logs into the Verifalia client area, the system will prompt them to enter the TOTP code.
MFA support in the Verifalia API
Multi-factor authentication is supported on our developer API through bearer authentication only; other authentication methods do not support this feature.
Please check our developer documentation for additional details.
What if I need to unenroll my MFA?
Unenrolling is quite easy:
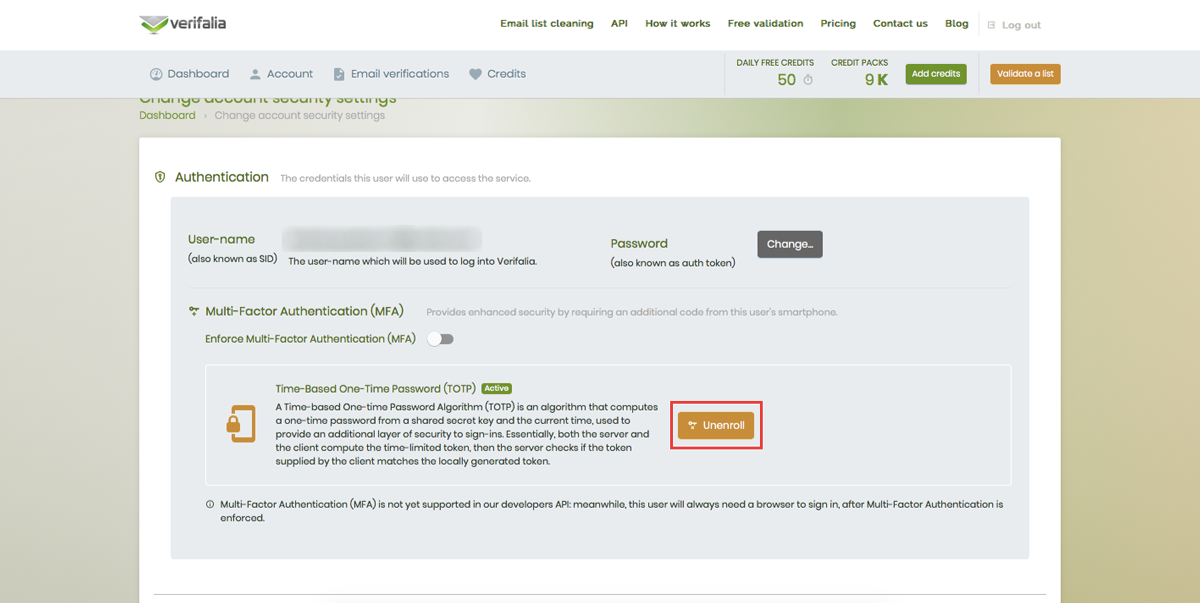
- Log into your Verifalia dashboard. Click the Account security settings link next to your account ID to manage MFA for your root Verifalia user, or find the user you want to modify in the Users interface and click the corresponding Edit button.
- Click the Unenroll button.
