We're updating our Terms of Service to ensure fairness and sustainability of our Free Plan: learn what's changing and how it affects you.
How to block invalid emails in Leadpages landing pages and pop-up forms
Leadpages is a powerful landing page and lead generation platform designed to streamline the collection of email addresses and valuable information from website visitors: it offers a user-friendly interface with customizable templates, making it easy for users to create compelling landing pages and pop-up forms to capture leads and expand their mailing lists.
However, it's really important to ensure that the email addresses you collect are valid and deliverable to make your marketing efforts effective: in this article, we'll explain how to prevent invalid email addresses and typos on your Leadpages landing page using the free Verifalia widget, ensuring that you only accept valid email addresses in Leadpages.
How to verify email addresses in Leadpages
It looks like Leadpages relies on your web browser to check if email addresses are valid when people fill out forms on its landing pages and pop-ups. However, this method isn't foolproof, and there's no guarantee that the emails you collect this way will actually work. This means you might end up with typos, disposable / temporary email addresses, or emails that bounce back when you try to send messages to them.
Fortunately, you can easily make sure that the email addresses you gather in Leadpages will work properly by using the Verifalia widget: you don't need to be a tech expert because it's simple to add to your Leadpages landing page or pop-up form with no coding required. This widget automatically checks email addresses using the Verifalia email checker, which can tell if an email address actually exists and can receive emails, and stops invalid and undeliverable emails from getting into your Leadpages forms.
How to add the Verifalia widget to a Leadpages landing page
To embed the Verifalia widget into a Leadpages landing page, follow these steps:
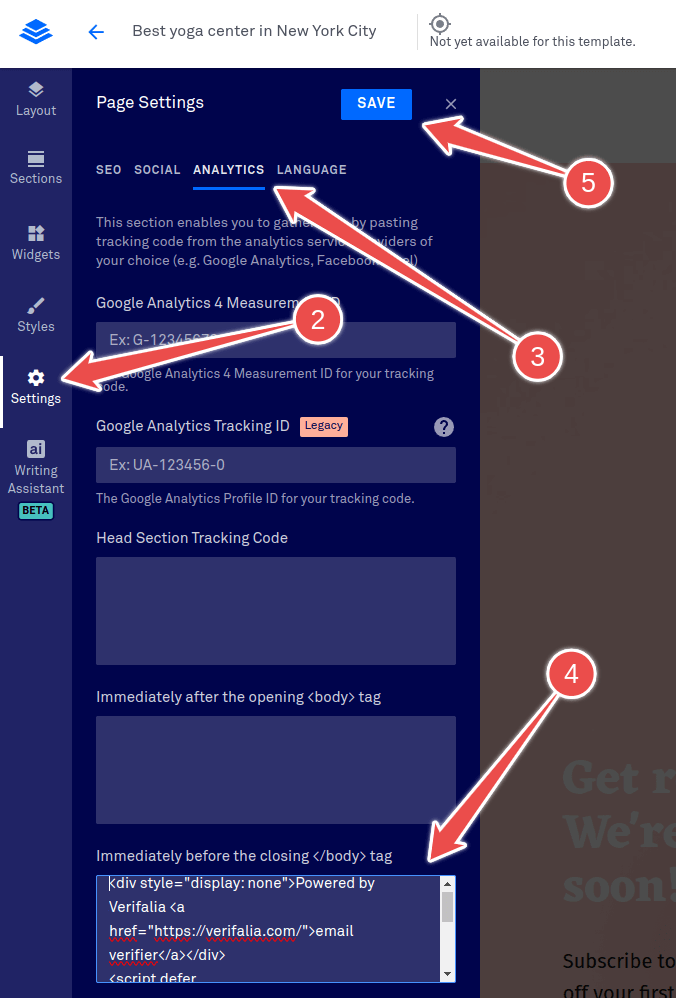
- Click the "Edit" button within the Leadpages user interface.

- In the editor window, locate the "Settings" button in the sidebar;
- Select the "Analytics" tab.
- In this section, paste the code snippet that you can copy from the Verifalia dashboard into the area right before the closing
</body>tag. If you don't have a Verifalia account, simply register for free. Using the widget requires a browser app key (a sequence of alphanumeric characters): create a browser app, if you don't have one already. Once you are on the Verifalia dashboard, you can easily generate the necessary embedding code from the Embeddable widget tab, which will include the aforementioned HTML code snippet. - Click the "Save" button to complete the process.

- Finally, click the “Publish” button to publish the landing page.
How to add the Verifalia widget to a Leadpages pop-up form
To include the Verifalia widget in a Leadpages pop-up form, follow these steps:
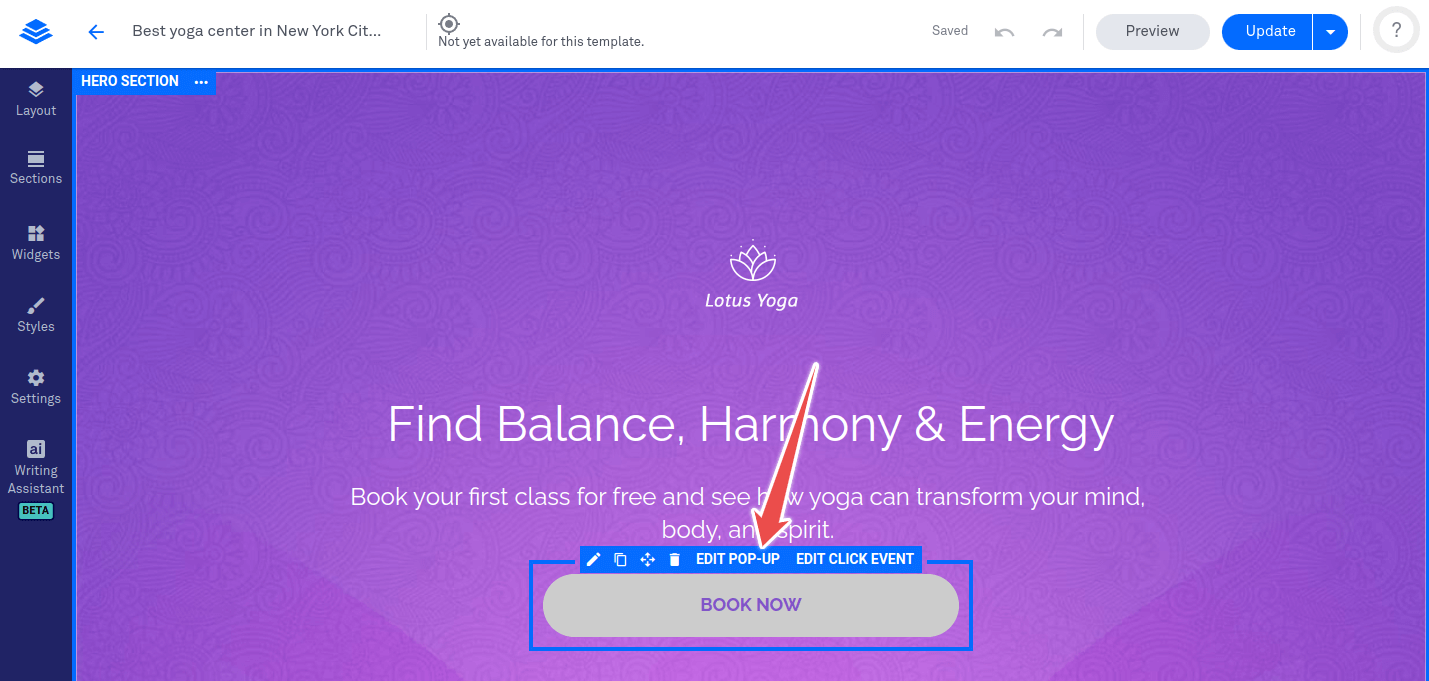
- Click the "Edit" button within the Leadpages user interface, as shown above, then click the "Edit pop-up" button that appears when you hover over the activation button.

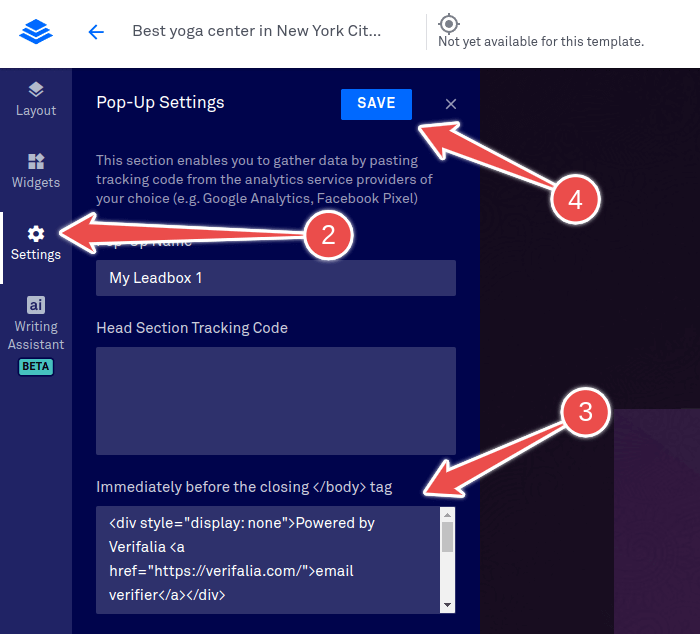
- Then, click the "Settings" button in the sidebar.
- Paste the code snippet, which you can copy from the Verifalia dashboard, into the "Immediately before the closing tag" text area. If you don't have a Verifalia account, simply register for free. Using the widget requires a browser app key (a sequence of alphanumeric characters): create a browser app, if you don't have one already. Once you are on the Verifalia dashboard, you can easily generate the necessary embedding code from the Embeddable widget tab, which will include the aforementioned HTML code snippet.
- Click "Save" to save your changes.

- To publish the page, simply click "Update" in the header.